ECAM - Nettoyage Hublot - Window Cleaning
The table below provides details of the duration of the activities.
the dismouting and mounting activities requires 2 people
| ID | Description | Duration |
|---|---|---|
| 1 | Preparation | 30min |
| 2 | Dismounting | 30min |
| 3 | Cleaning | 30min |
| 4 | Mounting | 30min |
| 5 | Pumping | 10h50 |
1. Preparation
1.1 Position the telescope in the window cleaning position
1.1.1 Open a terminal on glslogin1 and start a standard observation session with xrunall and EulerCam selected
1.1.2 When the telescope has finished its initialization, move it to the cleaning position with the UIF:
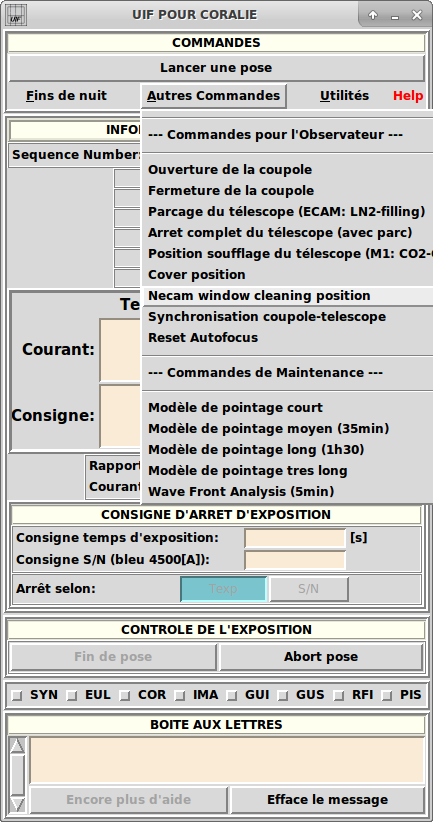
1.1.3 When the telescope is in place (see below the orientation and ignore the pump), it is imperative to activate the emergency stop to avoid any movement of the telescope (for example: remote initialization)
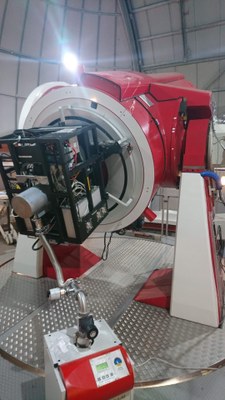
1.1.4 The cleaning operations can begin, but it is necessary to remember that at the end of the work, it will be necessary to give the access to the telescope by releasing the emergency stop followed by an initialization.
1.2 Stop ECAM
1.2.1 Open a terminal on glslogin1
1.2.2 connect to glsserv
ssh glsserv
1.2.3 stop ECAM
Nstop_CC
1.3 Collect cleaning equipment
1. Find the box "ECAM" located in the storage cabinet in the corridor between the control room and the bodega here
- Microfiber cloth
- isopropanol (Is it possible to source this through ESO ?)
- a system to blow either compressed air or N2 gaz.
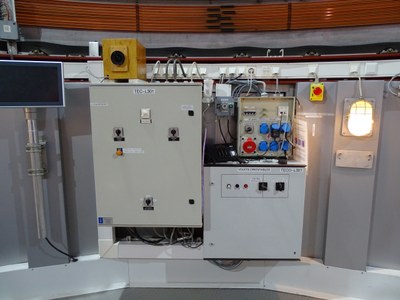
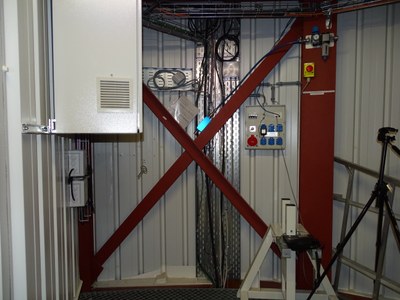
There is a compressed air output on the level of the telescope. One need to pick a filter box at the level below and connect it on ouput that is near the the electric cabinets near the scales in the cupola. There is a pipe + a pistol to blow air on optics in the crate in the ground floor of the telescope. Once assembled it looks like this :
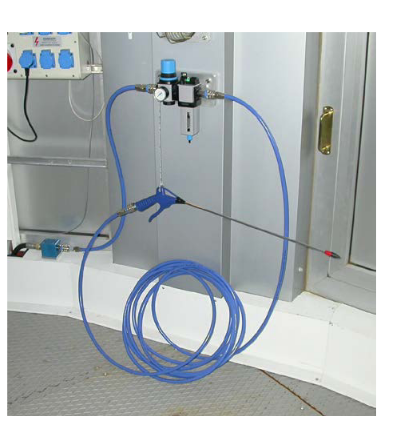
2. ECAM Dismounting
2.1 Go in the dome
2.2 check the telescope position telescope oriented as shown below with the circular rail on top of the camera)

2.3 push the emergency stop push button (red button bellow)

2.4 Switch off the ECAM power and control unit : main switch located near the main power cable at the back of the 3U rack
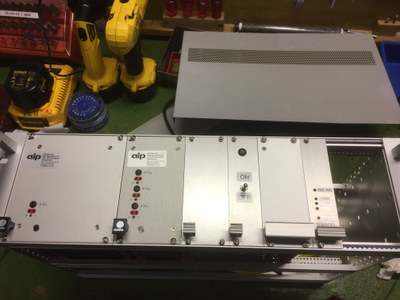
front panel
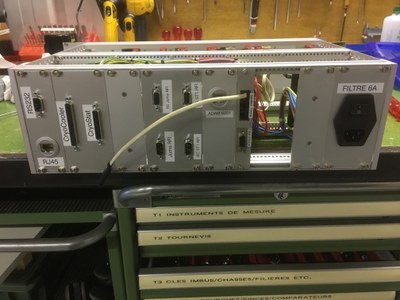
back panel
2.5 remove the cover in front of the lakeshore
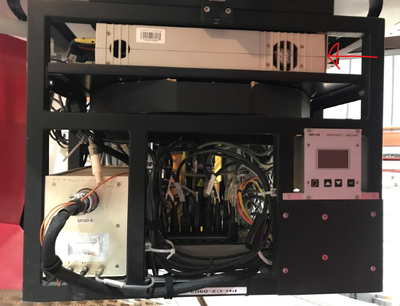
2.6 Switch off the lakeshore
2.6 Switch off the CCD power supply (gray box protruding outside the black frame at the cassegrain focus)
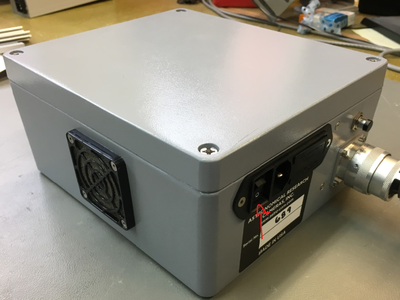
2.7 disconnect the 3 circular military connectors (bayonet lock) while firmly holding the rack frame to ensure a good ground connection (avoid ESD on CCD)
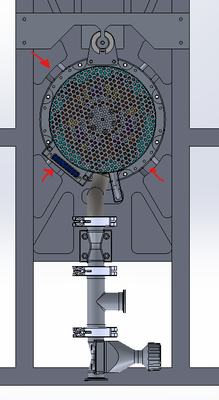
rear view
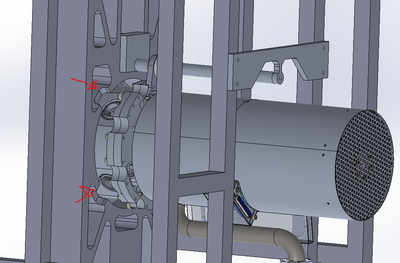
lateral view 1
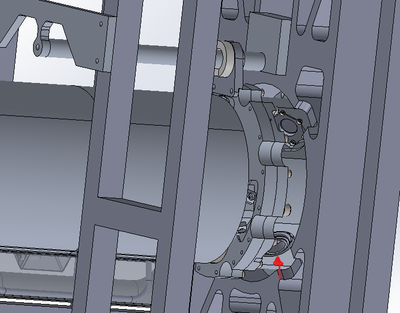
lateral view 2
2.8 install the plastic protective caps (located in the ECAM box) on the military feedthrough connectors.
2.9 disconnect the sub-D connector
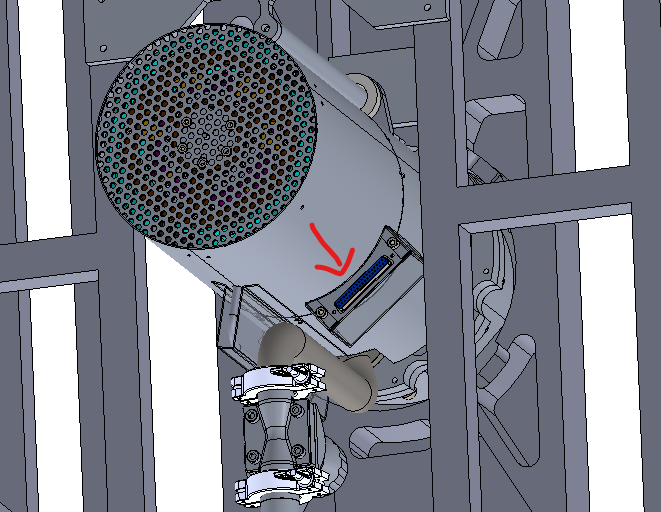
2.11 install the cover of the box hosting the telescope remote controller under ECAM to avoid loosing screws and washers during dismounting and re-mounting
2.12 install the wooden bench in the dome nearby the camera
HANDLE ECAM PLACING YOUR HANDS ON THE GREEN SURFACES ON THE PICTURES BELLOW. DO NOT TOUCH THE RED SURFACES
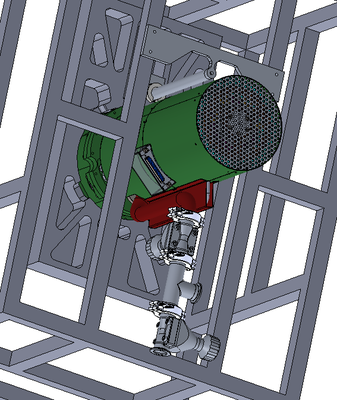
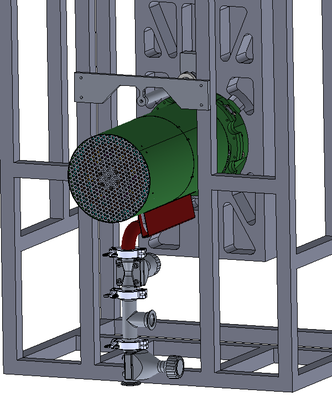
2.13 One person makes sure that ECAM stays in contact with the telescope
2.14 Using the dedicated ratchet and 2 extension rods (in ECAM box), the second person unfasten the screws . WARNING : THE LAST SCREW TO BE UNFASTEN SHALL THE ONE CLOSE THE RAIL
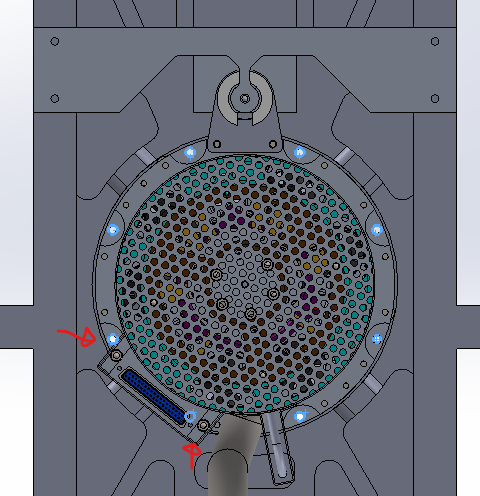
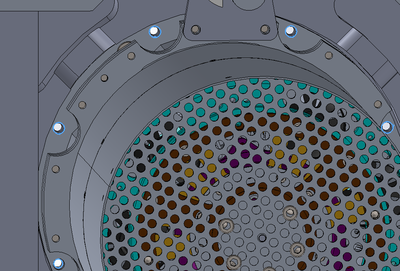
locations of the IF screws (the red arrows show the screws that shall be unfasten with the short extension)
2.15 Once the last screw is removed, while holding ECAM, gently slides ECAM along the centring diameter ( few mm deep) until ECAM leaves the centering diameter. then ECAM can slide on the rail
2.16 slide ECAM until the end of the rail
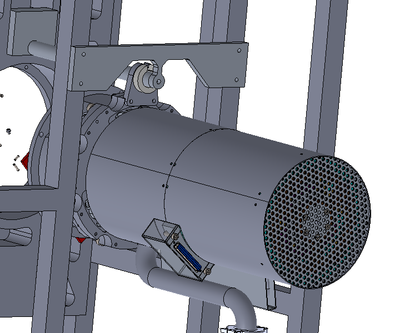
2.17 align the slot of the bearing with the plate holding the rail
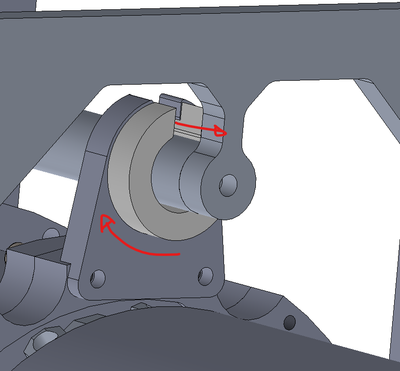
2.18 disengage ECAM from the rail
2.19 put ECAM on the wooden bench making sure that the red surface and the pumping pipe is not supporting ECAM weight.
3. Window Cleaning
Comment : a dedicated cover (in box "ECAM") can be installed on the window if the activities shall be stopped for any reasons
Cleaning should be performed with the following steps :
- Blowing compressed air / or N2 gaz on the window to get rid of the dust
- Gentle cleaning with a microfiber cloth, (lightly to avoid sctraches)
- Once all dust is removed, if there are some greasy spots one can try to clean them with a clean microfiber cloth and some isopropanol. To finish blow air to dry the isopropanol
4. ECAM mounting
4.1 verify that the slot in the bearing is correctly aligned
4.2 lift NECAM and engage it on the rail
4.3 rotate the bearing
4.4 slide ECAM until it touches its mounting plate
4.5 lift ECAM to engage it in the centring diameter
4.6 one person makes sure that ECAM stays in position
4.7 the second person starts fastening the screws using the ratchet following a criss-cross tightening sequence. no torque value specified (sorry) but the rachter is sufficiently short to avoid over-tightening.
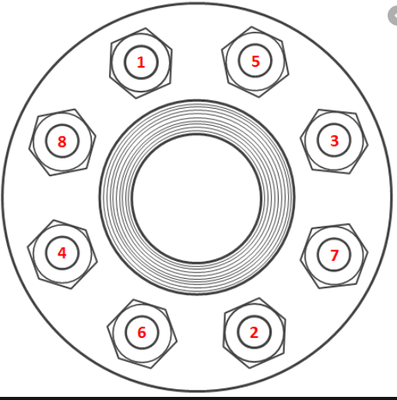
criss-cross tightening sequence
4.8 double check that the screws are tighten as excepted following a criss-cross tightening sequence.
4.9 remove the cover of the box on te floor
4.10 connect the cable of the pressure gauge
4.11 connect the sub-D connector
4.12 remove the plastic protective caps (located in the ECAM box) on the military feedthrough connectors.
4.13 connect the 3 circular military connectors while firmly holding the rack frame to ensure a good ground connection (avoid ESD on CCD)
4.14 Switch on the CCD power supply
4.15 Switch on the lakeshore
4.16 Put the cover in front of the lakeshore
4.17 Switch on ECAM power and control unit : main switch located near the main power cable at the back of the 3U rack
4.18 release the emergency stop push button
4.19 In xrunall (glslogin1) do a "Restart par groupe de process->euler" wait for the end of the initialisation and do a "Fin de nuit" on the uif
5. E-CAM pumping
procedure here
END
